
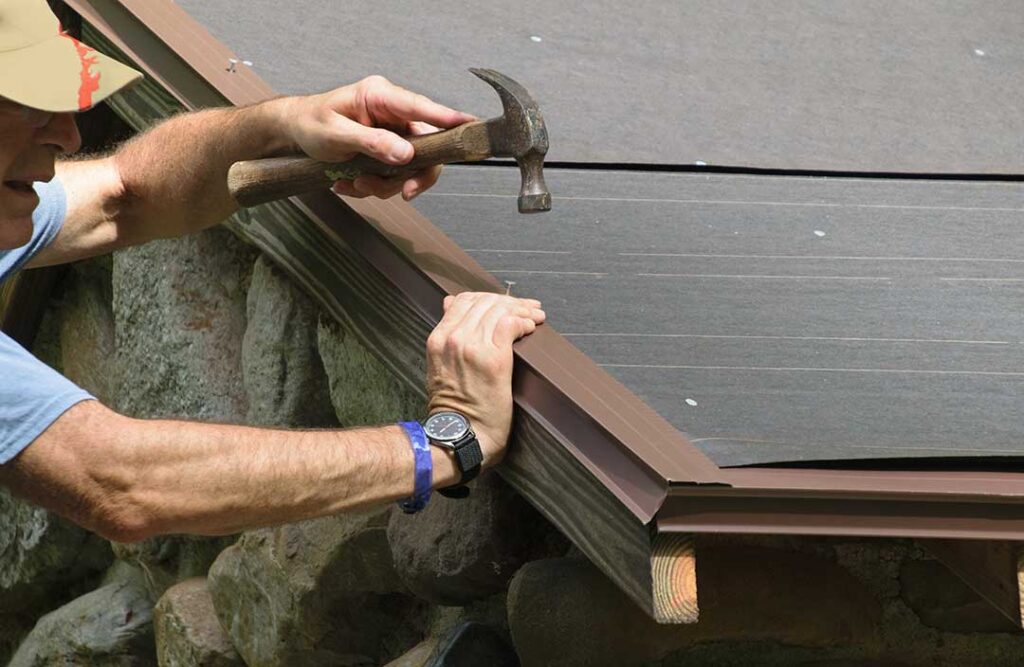
What is roof flashing?
Roof flashing is thin, water-resistant material installed where a roof meets another surface or where water is likely to collect. Its job is to direct rain and melting snow away from seams, joints, edges, and openings that are more vulnerable to leaks.
Flashing is commonly made from aluminum, galvanized steel, copper, or other corrosion-resistant metals. Some roofing systems also use specially formed membranes or prefabricated flashing components. The material matters, but correct placement and integration with the roof are just as important.
A roof may appear to be one continuous surface, but it contains many transitions. Flashing protects those transitions by creating a controlled path for water to move downslope rather than seep beneath shingles or roofing panels.
Where is flashing used on a roof?
Flashing is installed in several areas, including:
- Chimney edges and corners
- Roof-to-wall intersections
- Valleys where two roof slopes meet
- Plumbing vent pipes
- Skylights
- Dormers and roof projections
- Sidewalls and front walls
- Eaves, rakes, and roof edges
- Areas around roof-mounted equipment
- Intersections between different roofing materials
Each location presents a different drainage problem. A chimney, for example, interrupts the roof surface on all sides. A plumbing vent creates a circular opening. A roof valley concentrates water from two slopes. These areas require different flashing shapes and installation methods.
Why does roof flashing matter?
Flashing prevents water from entering the parts of a roof that shingles or panels cannot protect by themselves. Without it, moisture can work into sheathing, insulation, framing, siding, and interior finishes.
A small flashing defect may produce a much larger problem over time. Water can travel along rafters or wall cavities before appearing as a ceiling stain, making the original leak difficult to identify. Hidden moisture may also contribute to wood deterioration, mold growth, peeling paint, or damaged insulation.
In Ithaca, repeated freeze-thaw cycles make reliable flashing especially important. Water can enter a small opening, freeze, expand, and gradually widen the defect. Snow accumulation and spring thaw can also keep vulnerable areas wet for extended periods.
What are the main types of roof flashing?
Different roof locations call for different flashing designs.
Step flashing
Step flashing is made of short, bent pieces installed in layers where a sloped roof meets a vertical wall. Each piece is woven into the roofing material and the wall covering so water is directed downward in stages.
It is commonly used beside dormers, sidewalls, and other roof-to-wall intersections. Step flashing should not simply be covered by siding or roofing in a way that prevents proper drainage.
Continuous flashing
Continuous flashing is a longer piece of material placed along a roof-to-wall connection. It helps protect the joint but may need additional components, such as step flashing, counterflashing, or a properly designed wall transition.
Valley flashing
Valleys direct concentrated water toward the lower edge of the roof. Some valleys are protected with metal, while others use specialized membrane systems or carefully arranged roofing materials. Valleys are particularly sensitive to leaves, ice, debris, and poor installation.
Chimney flashing
Chimney flashing usually includes a base layer connected to the roof and counterflashing attached to or built into the chimney. These parts must work together. Surface-applied sealant alone is not a substitute for properly designed chimney flashing.
Vent flashing
Plumbing vent flashing seals the area where a pipe passes through the roof. It typically includes a base flange and a raised collar around the pipe. Cracked rubber collars, rusted metal, or gaps around the flange can allow water into the roof assembly.
Drip edge
Drip edge is installed along roof edges to help guide water away from the fascia and into the gutters or beyond the edge of the building. It also helps protect the edge of the roof decking from moisture.
What causes flashing to fail?
Flashing may fail because of age, corrosion, physical damage, movement, or installation errors. Common causes include:
- Loose or missing pieces
- Rust or corrosion
- Nails placed where they are exposed to water
- Deteriorated sealant
- Improper overlap between sections
- Roof replacement that leaves old flashing in place
- Siding or masonry work that disturbs the flashing
- Ice movement and freeze-thaw stress
- Debris collecting in valleys or around roof projections
- Flashing installed over, rather than beneath, water-shedding layers

Sealant often receives too much attention because it is visible and easy to apply. Sealant can help with limited repairs, but it eventually ages and separates. Flashing should be shaped and layered so the roof sheds water by design, not because a bead of caulk remains intact.
What are signs of a flashing problem?
A flashing issue may show up inside or outside the home. Possible warning signs include:
- Water stains near chimneys, skylights, or exterior walls
- Damp attic insulation
- Peeling paint or bubbling drywall
- Darkened wood around roof openings
- Missing or bent metal along roof edges
- Rust-colored streaks
- Loose siding near a roof intersection
- Water entering during wind-driven rain
- A recurring leak that appears only during snowmelt or heavy rain
- Shingles lifting near valleys, walls, or roof projections
A leak does not always appear directly below the failed flashing. Water may move horizontally along framing or roofing layers before entering the living space.
Can roof flashing be repaired, or does it need replacement?
The answer depends on the extent and location of the damage. A small, accessible issue may involve replacing a vent collar, securing a loose piece, or correcting a limited overlap. Widespread corrosion, damaged chimney joints, deteriorated roof decking, or improperly installed flashing usually requires more extensive work.
Replacing shingles around a flashing area without correcting the underlying transition may only provide a temporary improvement. Conversely, replacing sound flashing unnecessarily can add cost and disturb a functioning roof system. The condition of the metal, the surrounding roofing, and the roof structure should be considered together.
Work near steep slopes, chimneys, icy surfaces, or fragile roofing materials presents genuine fall and equipment hazards. Safety requirements and local building rules may also apply, particularly when flashing is altered as part of a larger roof or exterior-wall project.
How should homeowners inspect flashing safely?
A ground-level inspection can reveal useful information without climbing onto the roof. Look for visibly displaced metal, missing components, rust, damaged shingles, or debris blocking valleys and gutters. From the attic, check for damp insulation, daylight around roof penetrations, or darkened wood after rain.
Interior stains should be documented with their location and timing. Note whether they appear during wind-driven rain, prolonged precipitation, or spring thaw. This information can help distinguish a roof penetration from condensation or a plumbing leak.
Avoid walking on a roof that is wet, icy, steep, or unfamiliar. Flashing can also be hidden beneath siding, masonry, shingles, or roof membranes, so a problem that looks minor from the ground may involve concealed damage.
How does maintenance help protect flashing?
Routine roof maintenance helps flashing perform its job longer. Keep valleys and drainage paths clear of leaves and accumulated debris. Trim branches that scrape roof surfaces or drop heavy amounts of material. Check attic ventilation and insulation conditions because excessive indoor moisture can create problems that resemble roof leaks.
After major wind, heavy snow, or ice events, inspect the ground for loose metal or roofing pieces. During spring thaw, pay attention to leaks near chimneys, wall intersections, valleys, and roof penetrations. Prompt attention can limit damage to the roof deck and interior finishes.
Proper flashing is not merely a strip of metal added to a roof. It is part of the roof’s drainage system, and its success depends on layering, slope, fastening, compatible materials, and the way it connects with shingles, siding, masonry, and underlayment. For homes in Ithaca, NY, understanding these details makes it easier to recognize early warning signs and distinguish a surface patch from a durable water-management solution.
