

Roof flashing is the thin, shaped material installed around roof joints and openings to direct water away from vulnerable areas. It is commonly made from aluminum, galvanized steel, copper, or another corrosion-resistant metal, though some roofing systems use compatible membrane materials.
Flashing matters because shingles and other roof coverings are not designed to seal every transition on a roof. Areas where two surfaces meet—such as a wall, chimney, skylight, vent, or roof valley—need an additional layer of protection. Without properly installed flashing, water can enter behind the roof covering and damage wood, insulation, ceilings, and interior walls.
Where is roof flashing installed?
Roof flashing is used wherever water could collect, change direction, or move beneath the main roof covering. Common locations include:
- Wall intersections: Flashing protects the point where a sloped roof meets a vertical wall, dormer, or sidewall.
- Chimneys: Metal flashing is installed around the base of a chimney, often with stepped sections along the sides and a larger piece across the upper edge.
- Plumbing vents: Flashing surrounds the pipe and connects it to the roof surface while allowing the pipe to pass through.
- Skylights: Skylight flashing helps direct water around the frame rather than underneath it.
- Roof valleys: Valley flashing or a compatible waterproof underlayment helps manage water flowing from two roof slopes into one channel.
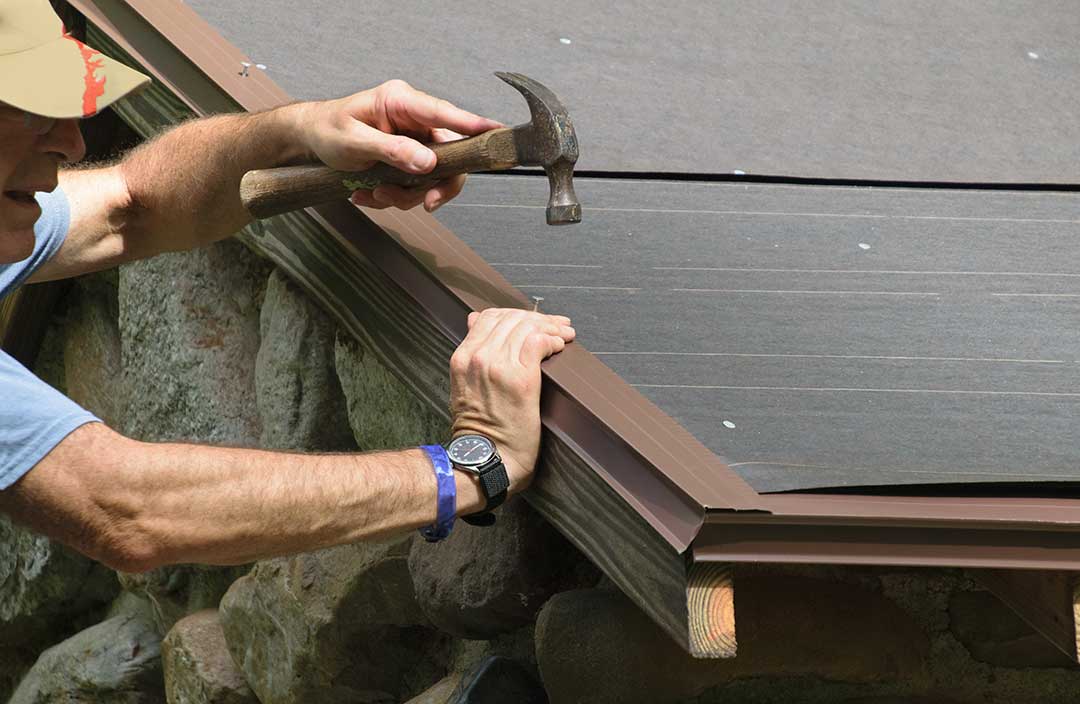
- Roof edges: Drip edge flashing directs runoff into gutters or away from the fascia and roof sheathing.
- Porches and additions: Areas where a lower roof meets a higher wall are especially dependent on correctly layered flashing.
The exact design depends on the roof material, slope, building age, and the type of joint being protected.
How does roof flashing prevent leaks?
Flashing works by creating a controlled path for water. Instead of allowing rain or melting snow to seep into a joint, the metal or membrane directs water over the next lower layer and back onto the roof surface or into the gutter system.
Proper flashing is installed in layers. The upper piece generally overlaps the lower piece so water flows downward without reaching the wood beneath. Roofing materials are then arranged around the flashing rather than simply placed over a gap.
Sealant may be used as a secondary measure, but sealant should not be treated as the primary waterproofing system. Caulk can shrink, crack, separate from a surface, or fail after repeated temperature changes. In a climate with snow, ice, rain, and freeze-thaw cycles, a flashing assembly needs sound construction and correct overlap—not just a visible bead of sealant.
What are the main types of roof flashing?
Different roof locations require different flashing shapes and installation methods.
Step flashing consists of short pieces of metal installed in alternating layers with wall materials and roofing. It is commonly used where a roof slope meets a sidewall.
Counterflashing is placed over or into a vertical masonry or wall surface to protect the upper edge of base flashing. Chimneys often use both base flashing and counterflashing.
Apron flashing is a larger, continuous piece installed at the lower side of a wall or roof-to-wall intersection.
Drip edge runs along roof edges. It helps move water away from the fascia and can reduce the chance that runoff reaches exposed roof sheathing.
Valley flashing is used where two roof sections meet. Valleys handle concentrated water flow, so they need careful design and clean drainage.
Vent flashing seals around plumbing vents and similar roof penetrations. The rubber or flexible collar around some vent flashings can deteriorate before the surrounding roof covering does.
What causes flashing to fail?
Flashing can fail because of age, corrosion, physical damage, poor installation, or changes made to the building. Common problems include:
- Rust or holes in exposed metal
- Cracked or missing sealant
- Loose flashing after high winds
- Improperly fastened pieces
- Flashing installed beneath the wrong roofing layer
- Gaps around chimneys, vents, or skylights
- Ice movement or repeated freeze-thaw expansion
- Debris collecting in valleys or behind roof features
- Roofing work that damages existing flashing
Older homes may have flashing that was installed according to outdated practices or altered during multiple roof replacements. A new layer of shingles does not automatically correct flashing problems underneath.
What are signs of a flashing problem?
A flashing leak may appear far from the actual entry point. Water can travel along rafters, roof decking, insulation, or wall cavities before becoming visible indoors.
Possible warning signs include:
- Brown or yellow ceiling stains
- Dampness near a chimney, skylight, or exterior wall
- Peeling paint or bubbling drywall
- Soft, swollen, or discolored trim
- Drips appearing after wind-driven rain
- Musty odors in an attic or upper room
- Wet insulation or darkened roof sheathing
- Rusted fasteners or deteriorated metal around roof penetrations
A stain that appears only during certain weather may indicate a flashing or roof-edge issue rather than a general roofing failure. Wind direction, melting snow, and water flowing from an upper roof section can all affect when a leak becomes noticeable.
Can roof flashing be repaired, or does it need replacement?
Minor problems may be repairable, but the correct approach depends on the condition of the entire flashing assembly. Replacing a small section of sealant may help temporarily if the metal is sound and properly installed. Loose or missing fasteners may also be correctable.
Replacement is more likely when flashing is rusted through, badly bent, improperly layered, or hidden beneath roofing materials that have already been disturbed. Chimney flashing may require more extensive work if the masonry joints, counterflashing, or surrounding roof materials have deteriorated.
Covering damaged flashing with additional caulk or roofing cement can hide the symptom without correcting the water path. It may also make future repairs more difficult.
Does new roofing include new flashing?
Not necessarily. Roofing work may include replacing certain exposed flashing components, but practices differ depending on the scope of the work and the condition of the existing materials.
Some flashing can be reused if it is correctly installed, undamaged, and compatible with the new roof covering. Other components—especially vent collars, valley materials, and flashing around roof-to-wall transitions—may be more practical to replace while the surrounding roofing is accessible.
Homeowners should ask which flashing pieces are being replaced, which are being retained, and how transitions will be protected. This is particularly useful for houses with additions, dormers, chimneys, or several roof slopes.
Why is flashing especially relevant for local homes?
Seasonal weather in Ithaca can place repeated stress on roof joints. Snow accumulation, ice formation, heavy rain, wind-driven precipitation, and alternating freezing and thawing can expose weak overlaps or loose materials.
Homes with steep roof sections may shed water and snow quickly into valleys or lower roofs. Older housing can also contain multiple additions and roof transitions, creating more places where flashing is needed. Keeping gutters, valleys, and roof edges clear helps water follow the paths that flashing was designed to protect.
Roof flashing is not the most visible part of a roof, but it protects some of the most vulnerable locations. Sound flashing keeps water moving across the roof system instead of into the structure, where a small leak can eventually become a much larger repair problem.
